Lockdown 6 Sourdough Bread

Sourdough Lockdown

Sourdough Lockdown


I love making sourdough!! Just let me open with that. I have had my sourdough starter for 7 years. This recipe is a basic, you will need to make a sourdough starter first before beginning (refer to the recipe below)


You will need to have fed the starter for two days in advance.


Please I’m telling you know if you have never made sourdough before IT’S AN EFFORT!

So only do this if you have time (if you’re in Lockdown, you got time how lucky are you)


I’m going to be fairly honest now, you probably will fuck it up the first time and second time and probably the third time.


When I first started making sourdough it took me almost a month before I was happy with my bread so be persistent and don’t give up, each time you will get better at understanding your starter and dough.


The temperature of the room, flour and water all play a part in making your sourdough amazing. If it’s a cold day it may take longer to rise, if it’s a hot day it may rise too quickly.


You will need a banneton to help with that all so sexy shape you’re after. You will also need a razor blade I don’t have the fancy holder thingy I just cut the thing.


I’m definitely not a baker but I know this recipe works just be persistent and in time you I’ll be an expert like me (chuckling to myself)


Depending on the flour you use you may need to add 50gm here and there the two brands I’m using are Manildra Group Plain Bakers Flour and a local dark rye stone ground flour.

 TIP: Whatever you do, no matter how wet the dough may seem DON’T ADD FLOUR all its going to do is absorb it and when you come to baking your bread you will end up with a really dense loaf. I sometimes bake in a dutch oven (pot with a lid) if you want to try this method here it is:

Dutch Oven Cooking Method - Preheat oven to 250 with pot and lid inside oven leave for 1hr

Remove your sourdough from the fridge, place on baking paper and score your dough however you see fit. being careful place the dough with the baking paper inside the dutch oven spray cold water around the outside of the sough but inside the pot creating steam, about 4 sprays, place back in the oven and bake for 25 mins. Remove the lid and bake for a further 25mins at a lower heat of 230. At this stage i like to play chicken with the loaf to see how dark i can get it!


Makes 1 large sourdough loaf

Ingredients

APPOX: 2 Days


200gm dark rye stone ground flour

400gm plain bakers’ flour

150gm active starter (fed for two days, twice a day, do the float test) 

400gm luke warm water (22 degrees)

Salt


In a large bowl place, the water and gently add the starter I do all the weighing on the scale as I make the bread. Again, the starter should be floating if not STOP NOW!!


Add the flours and with your hands mix well at this stage it will look a mess a very shabby dough. Leave to autolyse for 1 hour covered with a tea towel, this process allows the enzymes to work its magic without the interruption of fermentation. Read a book or something.

Aint to Shabby

Aint to Shabby


After 1 hour you should see the dough change a little you can sometimes even see a slight rise.


Season the top of the dough reasonably with salt turn the dough out onto a somewhat wet surface (run your hands under water then flick water onto the bench, this will prevent the dough from sticking) now season the underside of the dough.


You are now going to perform a folding and rolling technique this is where you trap air in the dough creating little air pockets and layers for the sourdough to grow.


Take your hands and grab the top of the dough (furthest away from you) either side as if shaking out a tea towel gently stretch the dough out pulling gently, fold the dough over itself, be quick as you want to trap the air inside the dough. Repeat the process left side to the right, the bottom to the top and right to left.


You will have almost a sausage shape (if the dough sticks to your hands wet them and shake hands a little to remove excess water)


Take the dough from the sides in both hands and lift off the bench allow the dough to fall, bob your hands up and down the dough will stretch allow the bottom of the dough to fall closest to you, you should see some seams in the dough as its now upside down gently roll the dough over itself tucking it in as you go, repeat the sausage roll one more time.


Clean your bowl.


Wash your hands and wet accordingly, pick the dough up with confidence and gently ball it in your hands using your finger to tuck the dough in underneath itself. Place in the bowl top side up for 30 minutes covered with a tea towel. Repeat both folding and sausage roll technique over the next 4 hours every 30 minutes. If you see bubbles try not to pop them, it’s a good sign.


NOTE: Be careful how much water you add, you need just enough on your hands and just enough on the bench but not too much so it slips and slides do not ever use flour not at this stage anyway.  The temperature I like the room to be is 20-22 degrees that way I can rest my dough on the bench. If it’s cold place in an oven with a cup of boiling water next to it (not under it) or you could just place it in the microwave. 


You are now ready for the final shaping this time use flour on the bench not too much just a sprinkling, sprinkle the top side of the dough and save some for your hands. Gently pull the dough away from the bowl.


Take the edges starting from the top and pull them into the middle stitching them over each other. (make sure there is no flour on the underside of the dough so it sticks to itself)


With a large pastry card or being very bloody gentle flip the dough back on the top side cup your hands over the top of the dough with your pinkie fingers touching the bench pull the dough toward you a few cm and turn the dough a little, this should help shape the dough into a ball.


Flour a Banneton and using your pastry card or hands lift the dough into the Banneton placing it upside down. Cover and leave in the fridge to prove slowly for 12 hours. (you can let it sit in the Banneton at room temperature for 4 hours then bake, but I find it easier to work with when cold)  

Ready to Rest 12hrs in Fridge

Ready to Rest 12hrs in Fridge


Place a pizza stone in the oven on the middle shelf, on the bottom shelf place an empty tray. Preheat the oven to 250 degrees let it go for a further 30 minutes after pre heating, you want the oven and stone to be as hot as possible.


Once the oven is ready gently flip the dough out onto baking paper if it’s sticks a little give it time it will fall you can help it a little by taping the Banneton. Once the dough is on the baking paper score however you see fit.

Cute

Cute


Have a small cup of ice water at the ready. Working quickly open your oven place the dough into the oven on the baking stone still on the baking paper and then pour the water into the tray underneath (SHUT THE DOOR FAST) this will create steam allowing the dough to rise and help create the ever so important crust.


Bake for 25 minutes. Turn the heat down to 230 degrees and bake for a further 25 minutes, whatever you do DON’T OPEN THE DOOR TILL THE VERY END!!
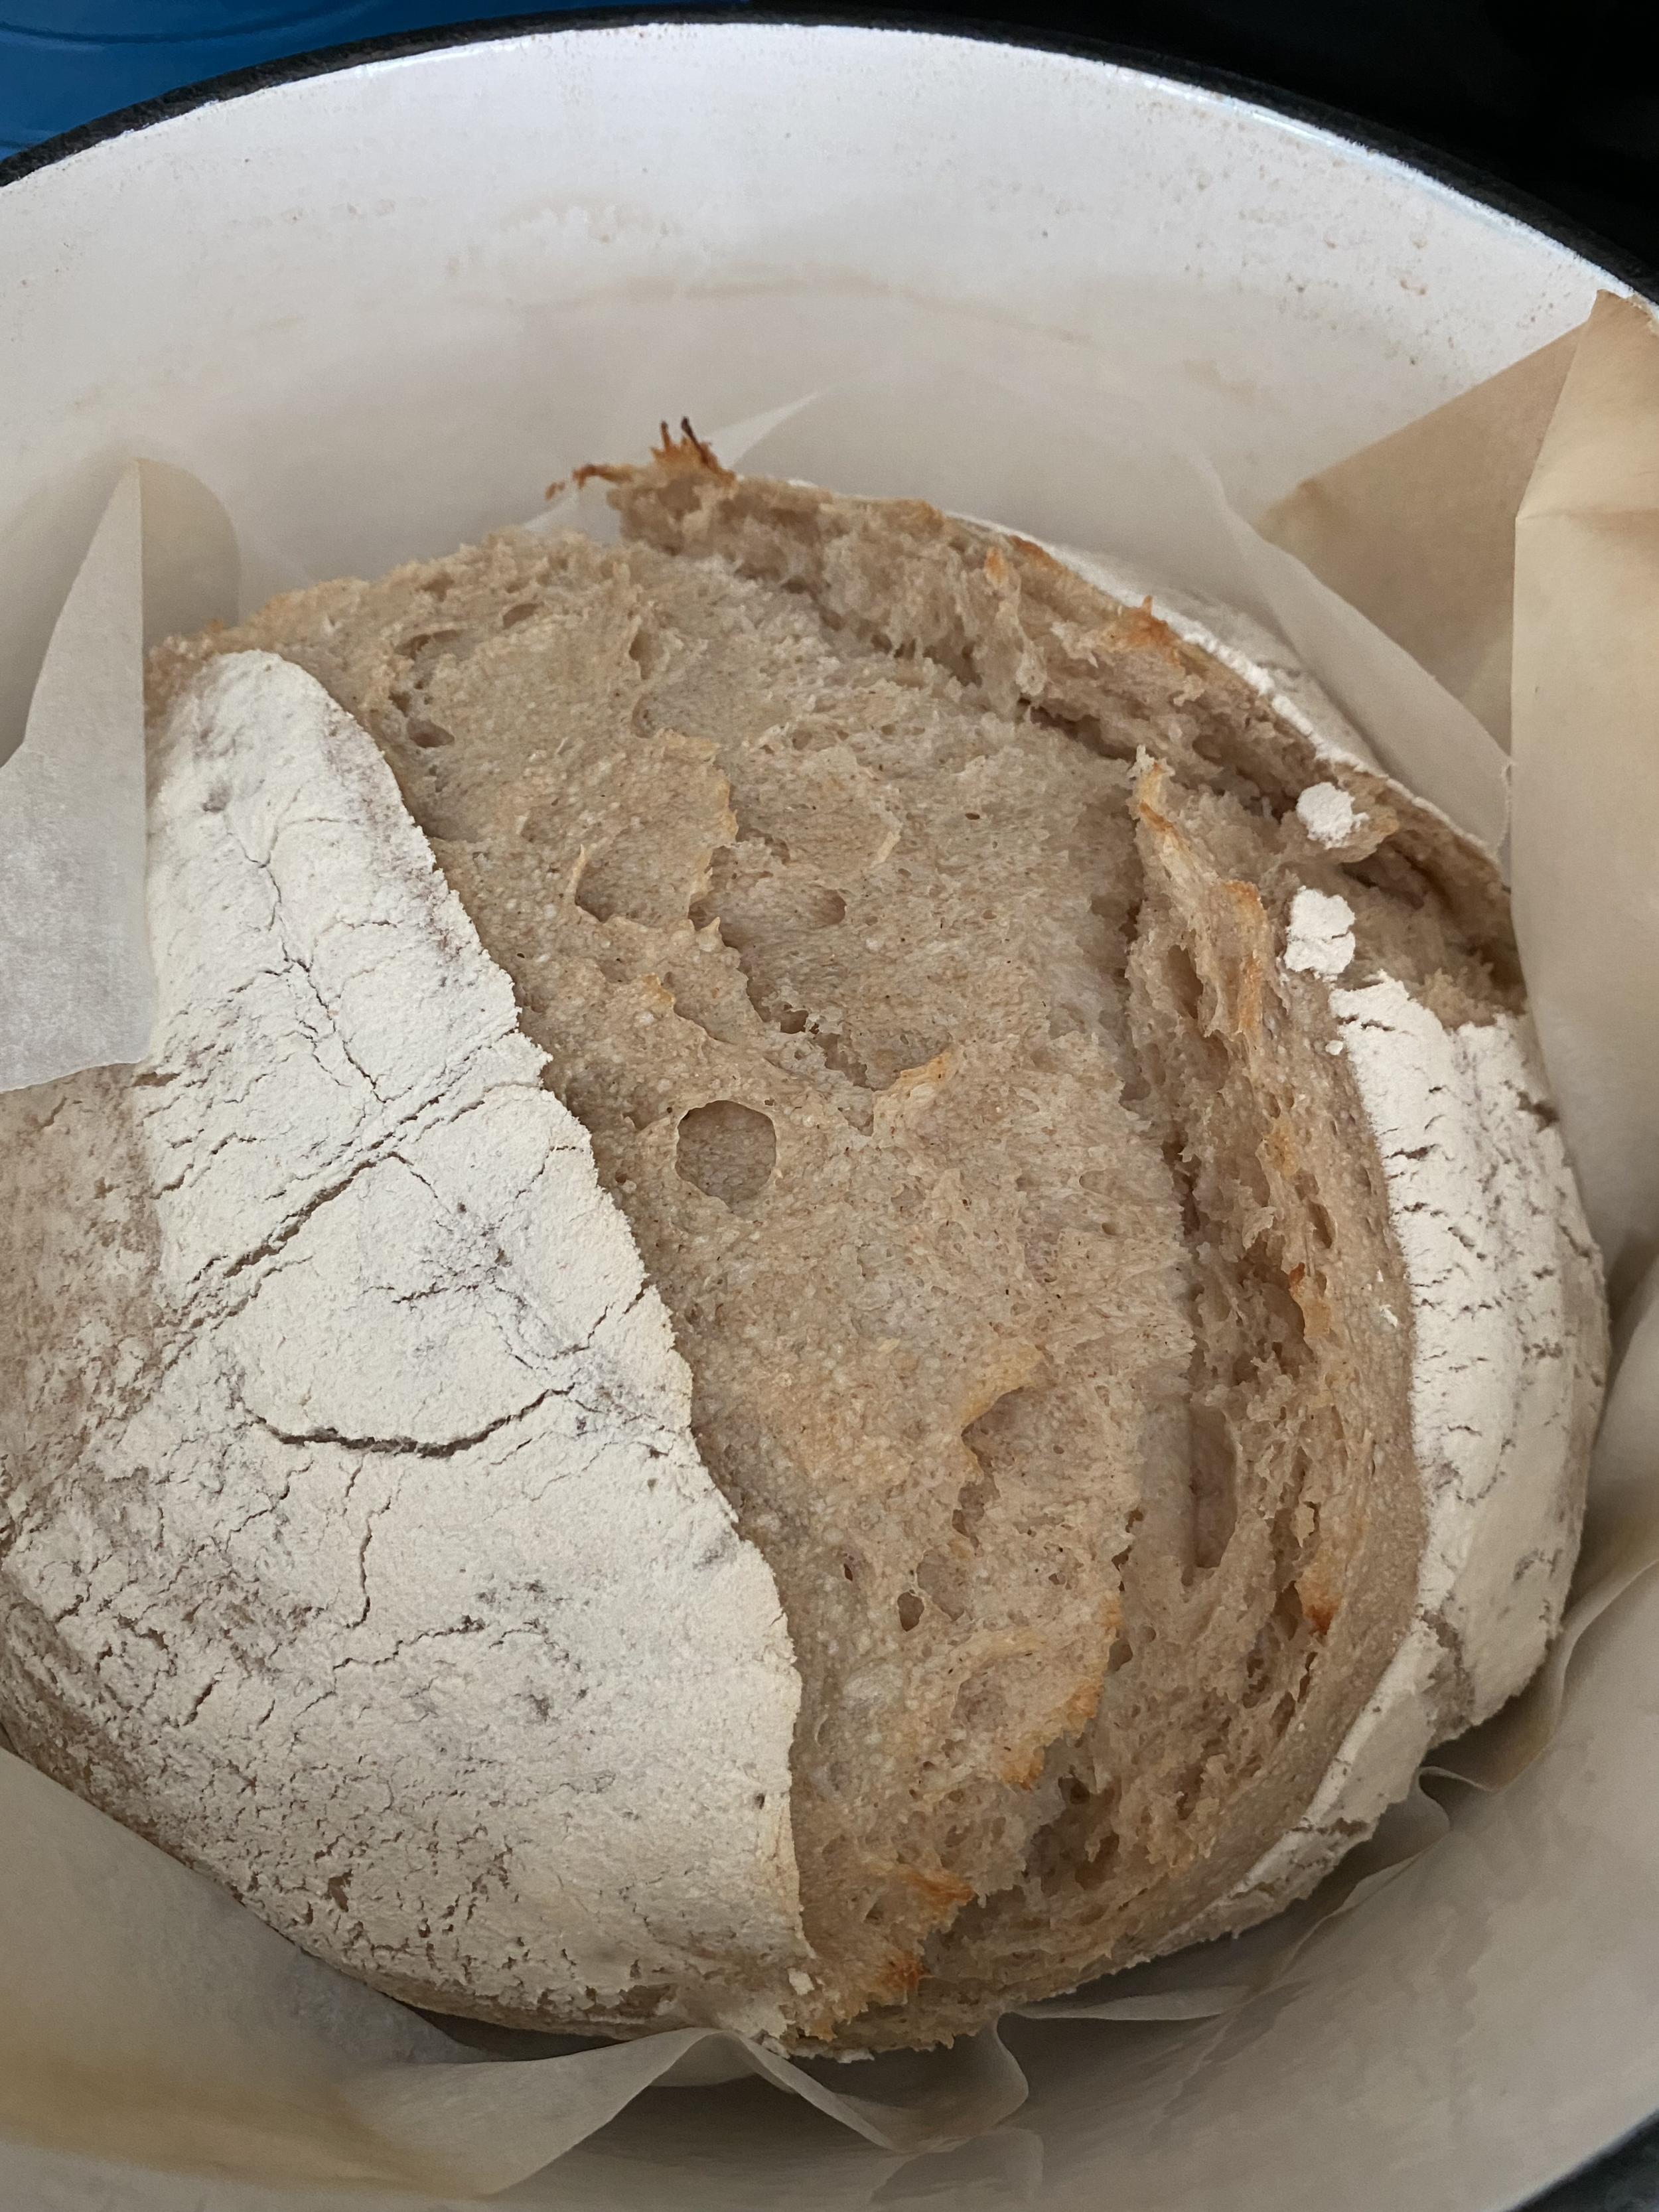
Half Baked

Half Baked


The End!

The End!

Congratulation you have baked your first sourdough bread. Rest on a cake rack for 3 hours don’t cut into it until its completely cool (as tempting as it may be the dough inside will still need to cook through so let it rest)

Half Loaf .png

You can dive in if you really, really want to, but I don’t recommend it.

Sourdough Starter

7 Day Process

Day 1. Mix 100gm stone ground rye flour with 150gm of luke warm water and cover with a loose-fitting lid leave 24 hours

Day 2. Remove all but 70gm of starter from the jar now add 50gm of plain flour and 50gm stone Rye flour then another 115gm of luke warm water. Mix and leave for 24 hours.

Day 3. It may or may not have risen repeat the process from day two.

Day 4. Repeat the process and this time only add 100gm of water.

Day 5. Repeat the process but leaving only 50gm of starter.

Day 6. Repeat the process but leaving only 25gm of starter.

Day 7. If you’re on day 7 and it’s not rising keep going with the removing and feeding for a few more days and it will eventually activate, trust me just be patient.


From day 7 you can now keep the discard and cook as a pancake instead of throwing it out. I love it with chili.


Your starter is now ready to use it doesn’t really matter the kind of flour you use as long as you begin the process with good ground rye flour every now and then I like to mix it up and add in other types of flour depending on what I’m baking.


Before baking I feed my starter for two days twice a day, especially if it’s been in the fridge. To test if your sourdough starter is ready to bake with I take 1 heaped teaspoon of the starter and drop it into a glass of luke warm water if it floats the starter is ready to use.

Bubbles Bubbles Bubbles If It Dont Float Dont Continue Making The Sourdough

Bubbles Bubbles Bubbles If It Dont Float Dont Continue Making The Sourdough

 I also do this when I make my bread I first add my water and starter to see if it all floats, don’t even bother baking if your starter doesn’t float!!!  One thing to remember you have created a living culture so remember to FEED IT!!!  


Dumplings, Dumplings, Dumplings

What a Shot by Aaron Towns

What a Shot by Aaron Towns

Chicken and Prawn Shumai with Chili and Black Vinegar  

These beauties are also going to be in my new book im writing on Asian food not this exact recipe but a version of. Here is just a taste of what will be.

Making dumplings at home can be very therapeutic and I can guarantee my way is easy, and guess what? I don’t even bother making the dough, over time getting the shape right will come naturally. The real test is in the tasting!!

You could serve these with coriander or even Vietnamese mint but to be honest I don’t like being to fussy. I just love to switch it up a bit and throw some salty salmon roe over the top plus it makes them look very pretty.

Makes 30 pieces also give yourself around 1hr

Ingredients  

170g prawn meat, deveined  

450g Chicken mince  

½ cup tinned water chestnuts, chopped  

1 tablespoon light soy sauce  

1 ½ tablespoon Shaoxing wine  

2 teaspoons sesame oil  

¼ teaspoon freshly cracked white pepper  

2 tablespoons chopped ginger 

1 spring onion, finely chopped 

2 tablespoons corn flour  

30 round egg dumpling wrappers or house made pasta sheets cut into 10cm rounds (You can use any won ton wrapper here, I use TAK ON WON TON SKINS YELLOW)

Salmon Roe (optional)

5 tablespoons Lao Gan Ma chili Oil

4 tablespoons Chinese Black Vinegar   

Method:

Chop the prawns roughly and mix with the water chestnuts.

Mix all of the remainder of the ingredients (except the wrappers and cornflour) in a large bowl and mix well to combine.  

To form the Shumai (don’t be too fussy) lay out five pieces of the dumpling wrappers and cover the rest with a damp cloth.

Place one heaped tablespoon of the filling in the centre of each wrapper.  

Gather the rest of the dough around the sides, leaving the top of the dumpling open.

Dab the bottom of the dumpling in a little corn flour to stop them sticking to the steamer. Repeat until you have no more wrappers and filling.  

Prepare a steamer with baking paper and lightly brush with a little vegetable oil to help stop the dumplings from sticking. Steam the Shumai in batches for around six to seven minutes or until cooked through.  Mix the chili oil with the black vinegar and place on the side top each dumpling with salmon roe or again place on the side and let your guests help themselves.


Nona's Lamb Ragu Or Ragout ??

Lamb Ragu Not Drowned in Sauce Just The Way My Nona Made It !

Lamb Ragu Not Drowned in Sauce Just The Way My Nona Made It !

Some people have asked me whats the difference between a Ragu and a Ragout? So Here it is no much! Read Below or if you want to skip the boring stuff get into the recipe and enjoy.

The difference between ragu and ragout isn’t really that much ragu is an Italian pasta sauce that is usually made with minced meat or vegetables and ragout is a French style stew that would normally be found on-top of a Paris style mash but the Italians would do this on-top of polenta. To be honest this is more of a ragout but because I’m serving this with pasta and its my Nona’s recipe today its ragu because that’s what we called it.   


In our house I cook lamb ragu at least once a month and I love using the lamb shanks as ill always keep some on the bone and serve it with a creamy mash potato or polenta you could also take this mix and make an Italian version of a shepherd’s pie.


My all-time favourite is pasta so what I’m giving you here is the recipe to serve a very large family so prepare for plenty of extras and trust me you will not be sorry.


I’m not going to ramble on about how to make your pasta but do me a favour and don’t drown the pasta in the sauce, let the sauce be one with the pasta so you can taste the actual pasta itself.


I’ve used spaghetti , a nice durum wheat style. (Dolce and Gabbana brand from Simon Johnson) This dish traditionally would be served with pappardelle but I’m not that big a fan I much rather a tagliatelle or linguini.


Finish this dish with a really good extra virgin olive oil I’ve used Lorenzo N.5 again from Simon Johnson. Two cheeses are great here Grana Padano or Pecorino Romano, if you like use a bit of both because that just adds another level of awesomeness and its 2021 so why the bloody hell not.  


Approx. 8hrs but for best results marinade overnight

Serves 8 - 10

Ingredients

4 large lamb shanks

2 carrots, cut into brunoise

2 celery sticks, cut into brunoise

2 small red onions, cut into brunoise

4 garlic cloves, chopped finely

1 tablespoon tomato paste

3 cups red wine

4 sprigs thyme

2 sprigs rosemary

300ml lamb or chicken stock, water is also fine

2 x 400g whole tinned tomatoes

100ml olive oil

To Finish

Salt and freshly ground white pepper  

1 bunch parsley finely chopped

1 packet of Spaghetti Dolce and Gabbana snapped or 2 packs of any normal pasta

Block of Grana Padano or Pecorino Romano

Lorenzo N.5 extra virgin olive oil or any one that you love  


Method

In a deep bowl place, the lamb shanks, carrot, celery, red onion, garlic, thyme and rosemary, add red wine and marinade over night or for at least 3hrs.


The next day strain off the lamb shanks and veggies keeping the wine. Pre heat the oven to 150 degrees. Grab a large heavy based pot or casserole dish, add half the olive oil and on a high heat seal off the lamb shanks until dark brown, set aside.


In the same pot add the remaining oil, veggies and cook for 15 minutes add the tomato paste and cook till split (the oil will come apart from the paste) add the wine and reduce by half, add the lamb shanks, cover with stock and tinned whole tomatoes. Bring to a boil and place in the oven for 3-hrs until shanks are soft and falling from the bone.


Strip the bones of the meat and shred being careful not to burn yourself. Remove the Thyme and Rosemary and discard. Simmer the sauce until reduced by almost half. At this stage I like to crush the tomatoes and squash some of the vegetables, add the Shredded lamb shank meat back to the sauce and season with salt and freshly ground pepper.


Place a large stock pot of salted water on the boil, add the pasta and cook for 7 minutes (if using Dolce Gabbana) or whatever your packet of pasta says cook 1 minute less. Drain the pasta and back in to the pasta pot add all the ragu sauce, mix well and add the pasta. Turn the heat back on high and cook for a further minute stirring regularly. Add the chopped parsley and remove from the heat taste for seasoning and serve immediately with the cheese of your choice grated on-top and a good drizzle of extra virgin olive oil, freshly torn basil is also a great addition here if you would like.  


As You Can See The Sauce is One With The Pasta Make Sure You Grab All The Bits From The Side Of The Pot

As You Can See The Sauce is One With The Pasta Make Sure You Grab All The Bits From The Side Of The Pot

You could cook less pasta and save some of the ragu for another day or another dish this ragu will last about 2 weeks in the fridge or 3 months in the freezer.   

Up Close And Personal Thats What You Want Everything To Stick To the Pasta

Up Close And Personal Thats What You Want Everything To Stick To the Pasta


To Vegan Or Not Roasted Vegetable Salad

Vegetable Fin.png

Well Id say im sorry this took so long to post the recipes for my blog but Im a busy guy. Please bear with me haha.

The Recipe that follows is my extremely yummy roasted vegetable salad. You may use any vegetables you like but I’ve chosen to use zucchini, brussels sprouts, carrot and red onion now you may ask what makes this so special and yummy and I’m about to tell you.  


Roasting vegetables in really good extra virgin olive oil with salt and pepper really bring out the natural flavours of the vegetables they really don’t need a dressing, I know once you try this you will see vegetables in a completely different light. I hate nothing more than over cooked zucchini and brussels sprouts so in this recipe they are roasted in the pan with extra virgin olive oil and salt nothing else.

If You Dont Like Brussels Give This Ago!! TRUST ME

If You Dont Like Brussels Give This Ago!! TRUST ME


The dressing consists of one of my favourite extra virgin olive oils Colonna Classic which has a really light bitter ness with touches of fruit this mixed with another favourite of mine is the Forum Chardonnay Vinegar both can be found at Simon Johnson and yes they are a little more expensive but when dealing with salads like this id say dont skimp! The dressing involves Dijon with a few pinches of poppy seeds and a squeeze of lemon juice now you may think this might all sound a little tart but the Dijon gives it creaminess and actually balances out the vinegar and lemon.


I finish this salad with roasted sunflower seeds, almonds, fresh chili and sultanas for sweetness and of course lots of fresh herbs I’ve chosen parsley and mint you can use whatever you want. Also, don’t be afraid to change the vegetables, broccolini or cauliflower roasted in a pan taste amazing also slow roasting a celeriac and cutting it up is also another great addition to this salad.


Now once you get it on the plate you can do as I’ve done and finish it with a really nice 30-month-old parmesan or you can choose to go the boring route and use a marinated goat’s cheese or even feta. Why Parmesan? Because its different and works well with the raisins it also adds a different kind of saltiness to the salad. Or if you really wanted to you can go Vegan and omit the Cheese this is totally up-to you.


Approx. 1.5hrs

Serves 4

Ingredients

4 carrots cut in half skin left on

2 medium sized red onions cut in quarters  

3 zucchinis cut in half

300g of brussels sprouts cut in half

2 tablespoons whole almonds skin on

2 tablespoons sunflower seeds

2 tablespoons chopped sultanas

1 red chili, cut into rounds

½ cup lightly packed parsley leaves, torn  

½ cup lightly packed mint leaves, torn  

Parmesan cheese to grate over the top

Salt and freshly ground white pepper


Chardonnay Vinaigrette

120ml extra virgin olive oil plus extra for cooking

50ml chardonnay vinegar

20ml lemon juice

1 tsp Dijon mustard

2 pinches poppy seeds.


Method


Set the oven to 220 degrees mix the carrots with the onions in a roasting tray and season well with extra virgin olive oil, salt and pepper you almost want to season it to the point where the vegetables are gritty with salt. Place in the oven and roast for 25 minutes.


Meanwhile take a large heavy based pan and place over a medium high heat add some extra virgin olive oil and repeat the seasoning process with the zucchini and brussels sprouts. You may need to do this in batches depending on the size of your pan place the zucchini cut side down and cook for 10minutes do not be tempted to turn them over they will not burn. Turnover and cook for a further 5minutes. all allow to rest on a tray they should not be falling apart they will continue to cook through as they cool. Do the same with the brussels sprouts and but cook only on the cut side for 5-6minutes set aside.


Check the carrots and onions they should be starting to get softer but again not falling apart they still need crunch now add the almonds and sunflower seeds and cook for a further      5-6minutes. remove from the oven and allow to cool to room temperature


While the vegetables are resting make the dressing. Mix everything together in a bowl with a whisk season with salt and freshly ground white pepper.


Once the vegetables are room temperature cut any shapes you like and mix them with the dressing enough to caught the vegetables lightly season again with salt and freshly ground white pepper. Add the herbs chili, sultanas, seeds and nuts you can chop the almonds or leave them whole, either way it doesn’t really make a difference. Place on the plate and drizzle with another tablespoon of dressing grate over the parmesan and serve immediately.


If you have left overs always bring them back to room temperature before making this salad as the flavour will change if the vegetables are cold.


For something different you could grill some sourdough rub with garlic and place this salad on top for a more elaborate bruschetta.


Vegetable No Cheese .png

Roast Balsamic Lamb Shoulder

Roast Balsamic Lamb Shoulder

Roast Balsamic Lamb Shoulder


This dish is simple and easy to knock out if your looking to cook for a dinner party and not really feeling like putting in the effort. Add a few sexy sides and your on a winner every time.

On the other hand if you want to impress that someone special and go that extra mile follow the recipe below then try this.

Pull the lamb from the bone and season it with salt and pepper add some soft herbs, I like parsley, basil and mint.

Roll tightly in clingfilm to form a cylinder shape set in the fridge for at least 8hrs.

Strain the sauce pushing everything through the sieve place back on the heat and reduce to a thicker glaze add 100ml of demi glaze or a few Knorr jelly stock cubes and reduce again by a third.

Cut the lamb into steak size portions and re heat in the balsamic lamb jus over a low heat about 15mins baste as you go.

Once soft remove the plastic and serve a-top some parsnip puree, place the onions on the side and you have a really nice dinner for two with a tone of left overs for sangas the next day.


Roast Balsamic Lamb Shoulder

APPROX. 4.5hrs

Serves 6

 Ingredients

2kg Lamb Shoulder Roast, slit and studded with 6 garlic cloves

3 brown onions, cut into wedges

2 x 400g canned cherry tomatoes in tomato juice

125ml chicken stock

200ml dry red wine

150ml balsamic vinegar


Method:

Preheat the oven to 160°C. Season the lamb with salt and pepper. Place in a large roasting pan.

Arrange the onion wedges around the lamb. Add tomatoes, stock, wine and vinegar.

Cover the pan tightly with foil. Roast for 2 1/2 hours until lamb is very tender and falling from the bone.

Increase the heat to 200°C.

Roast uncovered for a further 30 mins

Rest loosely covered for 30 more minutes

Serve whole at the table with lots of bread and a simple bitter leaf salad if you got the time.


Basting Away

Basting Away


Winner Grinner Mean Green Ham Hock Dinner

Split Pea and Ham Hock Soup with Gruyere and Mozzarella Toasties

Split Pea and Ham Hock Soup with Gruyere and Mozzarella Toasties

Now if your like me split pea and ham hock is on the top of my list of soups. But what really takes it to the next level is the toasties. Im going to keep this short and sweet cause i dont believe in rambling on for 50 paragraphs before you get to the recipe.

If you find rocket too peppery use spinach if you dont like onion use celery and if you dont want the stock to become too strong on the hock flavour dont throw the bone back into the stock. Also use any cheese you can find it really doesn’t matter and slather your bread with mustard its worth it! It’s also worth trying it with seeded mustard. As always give this one a go and i promise a winner grinner mean green ham hock dinner!

Split Pea and Ham Hock Soup with Gruyere and Mozzarella Toasties

Ingredients

Approx. 3hrs

20 gm butter, coarsely chopped

2 small onions, finely chopped

1 white carrot, finely chopped (orange is fine)

1 fennel bulb, finely chopped

4 garlic cloves, finely chopped

1 ham hock (about 1.2kg)

3ltr cold water

500 gm dried green split peas

380 gm frozen baby green peas

1 cup rocket

½ cup mint, plus extra to serve

½ cup flat-leaf parsley

Finely grated rind and juice of ½ lemon


Gruyere and Mozzarella Toasties

Softened butter

8 slices soft white bread

Dijon mustard, to taste

30 gm coarsely grated Comte Gruyere

30 gm sliced thin mozzarella

Sea salt and Freshly ground white pepper

Method:

Heat butter in a large saucepan over low-medium heat. Add onion, fennel, carrot and garlic and sauté until soft about 8mins. Add the ham hock, cover with the cold water bring to a simmer, then reduce heat to low, cook until ham is falling from the bone 1-1½ hrs. Remove hock, cool, then discard skin keeping the bone aside. Shred meat and reserve.


Meanwhile, add split peas and the bone back to the stock and simmer for 45 minutes to 1 hr until soft stirring regularly so the peas don’t stick to the bottom of the saucepan. Remove the bone and discard.


Add baby peas and simmer for 1-2 minutes. Stir in the rocket, parsley and mint for 30 seconds, turn off the heat and purée in a blender until smooth (you may need to do this in batches or use a hand-held blender) Stir in lemon rind and juice, season to taste and keep warm.


For the Toasties, spread butter on the bread slices, then place half the slices butter-side down on a work surface lined with cling wrap. Spread with mustard as much or as little as you like, top with cheeses. Season with lots of fresh white pepper and sandwich with remaining bread butter-side up. Toast in a non-stick pan on a medium high heat with a small knob of butter and oil until golden brown 3-4 mins then finish with more gruyere cheese grated over the top.

Warm the soup gently and season with salt and pepper being careful as some hocks can be fairly salty I like to finish with white pepper and a small pinch of salt. Scatter soup with warm shredded hock and extra torn mint and serve hot with Toasties.


Duck, Duck, Prune

Duck Breast With Prunes in Red Wine Jus and Chestnut Puree

Ingredients

Serves 4

Approx.1hr

4 duck breasts, scored in a diamond shape

Prunes in jus

100ml Armagnac

100ml red wine jus

100ml veal glaze

12 prunes


Chestnut puree

240g chestnuts, roasted and peeled

80ml thickened cream

200ml chicken stock 

Salt and freshly ground white pepper

Red baby sorrel to garnish


Method:

 To make the chestnut puree place the chestnuts in a pot and cover with the chicken, stock boil until the chestnuts are falling apart and soft.  Strain the chestnuts keeping the liquid and blitz in a vita-miser or blender add a little of the cooking liquid but not too much. (about half a cup) Add the cream and blitz, pass through a fine sieve or drum sieve if necessary. Season with salt and pepper set aside keep warm.

Place the duck in a medium non-stick frying pan, skin-side down. Cook over medium heat for 8 minutes, until medium rare. Turnover and cook for 1 minute. Set aside and rest for 4 minutes

In a pan place the Armagnac, red wine jus and veal glace, reduce by half and mount with a little butter. Add the prunes and allow to become sticky.

Trim the duck breast on both sides of the breast and cut down the middle. Presentation is up-to you. to serve I would normally allow a spoon full of puree three prunes and three baby sorrel leaves per plate.

Use chestnuts in winter, that’s when they are in season and at their best alternatively you can do the same with almonds and macadamia nuts. It’s important to season the chestnut puree fairly heavily it will take on lots of salt. You can also finish the puree with butter or lemon juice.

Real Italians Eat Anchovy’s

The Famous Dolce & Gabbana Linguini ooooooft

The Famous Dolce & Gabbana Linguini ooooooft

Linguini with Cherry Tomato, Chili, Capers, Olives and Anchovy’s  


Now who would have thought that Dolce and Gabbana would make pasta of all things but long and behold here it is and surprisingly its really bloody good durum wheat style pasta. I would probably put this up against Lello and these guys make awesome pasta. Anyway, enough about how good this pasta is because I know most of you are not going to go through the effort in finding it so just go buy whatever linguini you see fit.


You may ask can I use a rigatoni or a penne pasta maybe fusilli its totally up to you but for me personally linguini is the way to go.


Originally, I was going to share with you a fresh pasta recipe but really, I know most people don’t have time to be making pasta at home and this is so simple its quick enough to knock up in about twenty mins.


Also, for those of you who don’t like anchovy’s you need to get over it and give this ago trust me I hated anchovy’s growing up until I had proper ones. If you’re an anchovy hater go buy a decent brand check out my favourite ones below yes, they cost a little more but again you’re going to have to trust me I was an anchovy’s hater and in ways I still am but these ones I could eat till well the anchovy’s come home.

Ortiz Anchovies Available From Simon Johnson

Ortiz Anchovies Available From Simon Johnson


You could replace the tomatoes here with boiled kipfler potato or have them together remove the pasta and serve this with fish or steak and you be surprised how amazing of a side this becomes add a good squeeze of lemon and you’re on your way.   


Here we go!


Ingredients

Serves 2

Approx. 20 mins

80ml extra virgin olive oil

8 cherry tomatoes, halved

2 cloves garlic, chopped

1 small dried red chili, chopped

4-5 anchovies

6 pitted Ligurian olives

1 tbsp Lilliput salted capers, washed

Small handful of chopped parsley

300g Linguini, durum wheat if possible

Salt and freshly ground pepper


Method:

Place a large pot of salted water on the heat and bring to a boil. Place a heavy based pan on a medium to high heat, add the extra virgin olive oil, garlic, chili, anchovies and tomatoes and cook thill the anchovies are completely evaporated into the oil. Add the capers and olives season with a small pinch of salt and a good grind of pepper.

Once the water is boiling add the pasta and follow the directions on the packet usually about eight minutes I will usually pull it out about one and a half minutes earlier as I will continue to cook the pasta in the sauce.


Once the pasta is cooked add to the sauce with a little splash of the pasta water about two tablespoons this is going to help thicken the sauce.


Turn the heat back on to medium and cook for a further minute, make sure the pasta is coated well in the sauce add the parsley mix well and serve.

Pimp My Noodles

Mi Goreng with snapper and King Prawn

Mi Goreng with snapper and King Prawn

Mi Goreng with snapper and King Prawn

Having trained in some of Melbourne’s best kitchens won Chefs hats at the age of 27 and now a consultant to not only some of the best kitchens in Australia but also some pretty funky take away places you would think someone like myself would never cook Mi Goreng noodles!


But to be completely honest some of my favourite meals that I cook at home are the ones that come from packets. I just pimp them up so to speak with left overs and plenty of fresh herbs as this quintessential noodle dish needs as much love as you can give it.


I’ve done this with red snapper and king prawn but you can use any fish you like this would also work with braised beef, pork or lamb even chicken and duck are great here. I also had left over siu mai prawn dumplings in the freezer that I boiled and diced for an extra texture and some what a more pronounced Asian flavour.


I really love the simplicity to this, open a packet of noodles pan fry some fish and prawn or whatever you are using strain and toss through. If you want to skip any ingredients in this definitely don’t skip the fresh herbs it’s important to have them as they really bring the dish to life and take it to another level.

My Boyfriend is a big fan of these meals and really loves it when i whip one of these baby’s out and the best part is its ready in under twenty minutes.


Enjoy.


Ingredients

Serves 2

Time approx. 15mins


2 packet Jumbo Mi Goreng noodles  

100ml peanut oil

2 120g fillet of red snapper

2 king prawns peeled to your likening (I keep the head on and squeeze it over the top of the noodle for maximum flavour)

¼ bunch coriander

¼ bunch Vietnamese mint

4 tablespoons fried shallot

4 tablespoons roasted peanuts, crushed

1 long red chili, cut into rounds

1 long green chili, cut into rounds

4 siu mai dumplings, boiled and cut into 2mm dice

Salt


Method

Place a medium pot of water on a high heat and bring to a boil add the noodles and cook for 3 mins.


While that’s happening heat a non-stick pan over a medium high heat and add the peanut oil. Once the oil begins to shimmer season the fish on both sides lightly and add the fish skin side down to the pan and cook for 2 mins. Add the prawns to the same pan and cook for a further minute turn the heat off and flip the fish over turn the prawns and leave for a further minute this will let them gently cook through to perfection.


Drain the noodles well and place in a bowl with all the Mi Goreng packet ingredients and mix well, add the siu mai and all the remaining ingredients leaving two tablespoons of peanuts and two tablespoons of shallots to garnish along with a few sprigs of herbs.


Place the noodles on the plate followed by the fish and prawn now at this stage I like to take the prawn head and squeeze it over the top of the noodles this is completely up to you I understand if it’s not your thing, if not lob off the head throw over the remaining ingredients and if your like us add some sriracha and bobs your uncle you’ve got yourself some pimped-up noodles.  


Simplicity At It's Best: Vietnamese Slaw with Snapper, King Prawns, Nuoc Cham and Chili

Viet Slaw with Snapper and king prawn

Viet Slaw with Snapper and king prawn

This week’s dish was inspired by my work taking me across to Sydney for a few days for a client of mine who also had a client that needed some help with catering. It just so happens to be that this other client was Chin Chin.


Soo all week I’ve had the absolute pleasure in working with some of Australia’s best produce and one of Australia’s best chefs. I’m lucky in my job as a consultant that I get to work with such amazing people.


This dish was inspired by one of the dishes I had while I was in Sydney I tasted this amazing roasted pork bun that had an Asian slaw in it and I thought wow I’d love to do this without the bread and add snapper and prawn and make it salad.


This salad would also be great with the wings of the snapper deep fried and then tossed through but at the moment I’m trying to stay healthy so I whipped up this little baby. you could try this with roasted pork and prawn or even roast duck or boiled chicken it’s also amazing on its own. Apple here is nice it freshens the salad, lots of herbs is important if you’re going to skip something on this don’t skip the herbs also green mango makes a really nice addition.


Ingredients

Serves 5-6 people

Time approx. 30 mins depending on your knife skills


Vietnamese Slaw

½ wombok cabbage, finely shredded or torn

½ carrot, cut into julienne

½ large cucumber, cut into julienne

½ small daikon, cut into julienne 

½ small salad onion, sliced finely

100g bean sprouts

1 long green chili with seeds, sliced into rounds

1 long red chili with seeds, sliced into rounds 

3 tablespoons fried shallots (store brought is best)

3 tablespoons roasted peanuts, crushed

¼ bunch coriander, washed stalked removed stem left on and roughly chopped 

¼ bunch Vietnamese mint leaves, torn 

¼ bunch mint leaves, torn

¼ bunch Thai basil leaves, torn

1 tablespoon Lao Gan Ma chili oil


Nuoc cham

190ml fish sauce

250ml sugar syrup (150ml water warm, 100g sugar dissolve sugar in water)

130ml fresh lemon juice


500gm snapper fillets skin on bones removed

5 king prawns, heads and tail on middle shell removed

60ml peanut oil


Once you have all the ingredients chopped and all the herbs picked this salad is a really easy one to put together depending on your knife skills this could take some time but trust me it’s worth it.


Mix all salad ingredients except the chili oil in a bowl and set aside. To make the Nuoc Cham mix all ingredients together and taste. It should be sweet, sour and salty, set aside.


Place a pan on a medium high heat and add the peanut oil, once the oil begins to shimmer cook the fish skin side for 3 minutes undisturbed. Using a fish slide gently turn the fish over and cook for 2 more minutes remove and rest the fish on paper towel. In the same pan turn up the heat and add the prawns cook for 1 ½ minutes on each side remove and allow to rest with the fish.


Simply toss the salad with about 100ml of nuoc cham and the chili oil, mix well.


This part is up to you, you could flake the fish through the salad or you could do as I have done and chop the prawn through it (with the head as this is where all the flavour is but I understand if you’re not keen) Then sit the fish on top, either way it’s delicious and if you really want to go a step further you could marinate the fish and prawns in yellow curry paste and yes you can buy it I’m not going to hold that against you.   


Baked Ricotta Gnocchi With Lamb Ragu

Baked Ricotta Gnocchi with Lamb Ragu

Baked Ricotta Gnocchi with Lamb Ragu

The Recipe below is one of the easiest home-made gnocchi recipes ever, you literally can make it from scratch in under 20 minutes.

If you really have time you could boil up about 1kg of potato and mash them into this mix for potato and ricotta gnocchi and that just really lifts this dish to the next level and gives the gnocchi a little more texture and making it a more traditional style Italian gnocchi.


Although if you are lazy like me sometimes store-bought gnocchi is fine too. Remember these recipes are guides for you to do what you want, simple dishes to make for your family and friends in the comfort of your own home with no dramas.


Essentially this is a Bolognese with lamb. Feel free to use veal, beef and even chicken can be a really good substitute. I’ve also had this with pork which is seriously yummy.


I remember my grandpa used to make his Bolognese with pork, beef and veal so you can do the old combo here as well.


I’ve gone for lamb as it’s what I had in the fridge at the time. A bold red wine like Barolo is great here but really any red will do, if you are like me you’ll want to cook with what your drinking and trust me Barolo here is the go to wine in my opinion.

Give this ago and even if it’s only two of you, you’ll have lunch and dinner for a week!


Ingredients

Serves 5-6 people

Time approx. 2hrs


For The Ricotta Gnocchi

450g whole milk ricotta cheese (drained of excess water)

3 egg yolks

1 cup (265g 00 flour)

3/4 cup (about 1 ounce) freshly-grated Parmesan

3/4 teaspoon fine sea salt

1/4 teaspoon freshly-cracked black pepper


Lamb Rague Bolognese

1/4 cup plus 2 tablespoons extra-virgin olive oil

2 large carrots, finely chopped

1 large onion, finely chopped

100g thickly sliced pancetta, cut into 1/4-inch dice

600g lamb, coarsely minced

3/4 cup of Barolo red wine (or any red wine you wish)

1 x 450g Italian tomatoes, coarsely chopped, juices reserved

1 cup chicken stock

1 bay leaf

150g buffalo mozzarella torn

60g pecorino cheese

Extra virgin olive oil to serve

Salt and freshly ground white pepper


Method

Bring a large stockpot of generously-salted water to a boil over high heat.


Add to a large bowl the egg yolks and ricotta and stir briefly to combine.  Add in the flour, Parmesan, salt and pepper, and stir until evenly combined.  Avoid over-mixing.  The dough will be a bit moist and maybe a bit sticky, but it should hold together.  If it feels too wet, just add in another few tablespoons of flour.


Shape the dough into a round disk with your hands, then transfer it to a lightly-floured cutting board and sprinkle the dough lightly with flour.  Using a knife cut the dough into eight even wedges.  Using your hands, gently roll out each wedge into an even log, approximately 3/4-inch wide.  Cut each log into individual bite-sized little gnocchi squares.  Lightly dust the gnocchi with flour once more and give them a quick toss so that they are all lightly coated with flour.  (This will help prevent them from sticking together.)


Being careful in two batches transfer the gnocchi to boiling water. Cook usually for around 30 seconds or till they float. Drain the gnocchi and set aside to cool.


For the lamb ragu In a medium size pot, heat 1/4 cup of the olive oil until shimmering. Add the carrots and onion, cook over moderate heat, stirring occasionally, until softened and just beginning to brown, about 12 minutes. Using a slotted spoon, transfer to a plate.

Heat the remaining 2 tablespoons of oil in the same pot. Add the pancetta and stir once or twice over moderately high heat until sizzling. Add the lamb and cook, stirring occasionally, until the liquid has evaporated and the meat is browned, 10 minutes. Return the vegetables. Add the red wine and simmer until evaporated, scraping up any browned bits from the bottom of the pot.

Add the tomatoes and their juices, the chicken stock, bay leaf and Season with salt and black pepper and bring to a boil. Reduce the heat to moderately low, cover partially and simmer, stirring occasionally, cook for 45 minutes. Discard the bay leaf.

Set the oven to 180 degrees. Take 1kg of cold gnocchi and stir it through the ragu once evenly distributed and nice and saucy pour the gnocchi ragu into a baking dish big enough to fit all of the mixture in comfortably. Break over the buffalo mozzarella and grate over the pecorino generously.

Place in the oven for 30 minutes or until golden brown. Serve immediately with sourdough bread and lashings of extra virgin olive oil.


The Humble Tiramisu

tira 2.jpg

Tiramisu is one of my all-time favourite desserts my grandma used to make it when I was a child I still remember dipping the savoiardi biscuits while standing on the chair in the kitchen, yes it was made with the alcohol. To this day the smell of a short black in the morning reminds me so much of my grandmother’s tiramisu. This is my take on my grandmother’s classic Italian tiramisu. For something a little different I like to put the mascarpone mixture into a piping bag and pipe individual mounds atop the dessert! You could also make individual serves in martini glasses or tumblers. If You have blocks of chocolate you could also take a peeler and shave the chocolate into nice long shards like my grandmother used to, but I like the little flecks from a micro plane or grater I find it much more elegant. If you really wanted to shell out you could top with silver leaf or even gold leaf!


Ingredients

Serves 15

100ml warm water

380gm caster sugar

1kg mascarpone

180ml espresso coffee (S.P Signature Blend in Store Now)

60ml rum

200ml Frangelico or marsala one or the other marsala is more traditional

24 Italian sponge biscuits

1 tablespoon Callebaut cocoa powder

200gm block dark chocolate to shave or grate over the top


Method

Combine warm water with caster sugar in a small saucepan and stir over a low heat until the sugar is dissolved. Bring to a boil, don’t stir the mixture for three minutes. At this stage it should have reached 112 degrees on a sugar thermometer you now have a sugar syrup.


Whisk egg whites in the bowl of an electric mixer until foamy. Then, with motor running, gradually pour in sugar syrup from a height and beat until mixture becomes thick and glossy.


Being gentle fold a ¼ of the egg white mix into the mascarpone to loosen, then whisk in the remining egg whites until combined.


Combine the coffee, rum and Frangelico (if using) then dip biscuits in the mixture, turning to coat both sides.


Place a layer of biscuit over the base of a 24cm round tin, approx. 4cm deep. Spread with half the mascarpone mixture, sift half cocoa over and grate over chocolate then repeat this process one more time but this time with the mascarpone place in a piping bag and pipe little mounds around the tiramisu and finish with cocoa and grated chocolate. Cover and refrigerate for at least 4-6 hours or until firm.


To serve, scoop out portions onto small side plates